本文共 4773 字,大约阅读时间需要 15 分钟。

is one of the most popular–and arguably most powerful–lines of smarthome products out there. If you’re just getting started with Insteon, here’s how to set up your hub and your first device.
是目前最流行且功能最强大的智能家居产品系列之一。 如果您刚刚开始使用Insteon,请按照以下步骤设置集线器和第一个设备。
什么是Insteon? (What Is Insteon?)
Insteon, at its simplest, is a . Insteon makes smart outlets, smart light bulbs and switches, a smart thermostat, motion sensors, security cameras, and other products designed to be a sort of “one stop shop” for all your smarthome needs. You just need an or to control it all.
最简单的Insteon是一系列。 Insteon生产的智能插座,智能灯泡和开关,智能恒温器,运动传感器,安全摄像机以及其他旨在满足您所有智能家居需求的“一站式服务”产品。 您只需要或即可控制所有内容。
Unlike many other smarthome hubs, which use Wi-Fi, to communicate with different products, Insteon uses its own proprietary protocol. It does have limited support for a few non-Insteon products–like the Nest Thermostat and Amazon Echo–but doesn’t offer any integration with .
与许多其他使用Wi-Fi, 与不同产品进行通信的智能家居集线器不同,Insteon使用自己的专有协议。 它确实对少数非Insteon产品(例如Nest Thermostat和Amazon Echo)的支持有限,但不提供与任何集成。
Instead, Insteon’s real power comes through when combined with an . In fact, this is really its biggest draw. Insteon can be very simple with basic functionality, or it can be very complicated and very powerful (not to mention expensive). If you’re looking for something more in the middle (moderately powerful and user-friendly), however, Insteon may not be right for you.
相反,当与结合使用时,Insteon才能发挥真正的力量。 实际上,这确实是它最大的吸引力。 Insteon具有基本功能可以非常简单,也可以非常复杂且功能强大(更不用说昂贵)。 但是,如果您在中间寻找更多功能(中等功能和用户友好),Insteon可能不适合您。
如何设置您的集线器 (How to Set Up Your Hub)
So you’ve got an Insteon Hub and one or two products you want to control with it. Setting them up is fairly simple: first, grab your Hub and plug it into the wall and your router via Ethernet. Make sure it’s easily reachable, since you’ll need to access it again in a moment.
因此,您拥有一个Insteon Hub和一个或两个要使用它控制的产品。 设置它们非常简单:首先,抓住集线器,然后通过以太网将其插入墙壁和路由器。 确保您可以轻松访问它,因为稍后需要再次访问它。
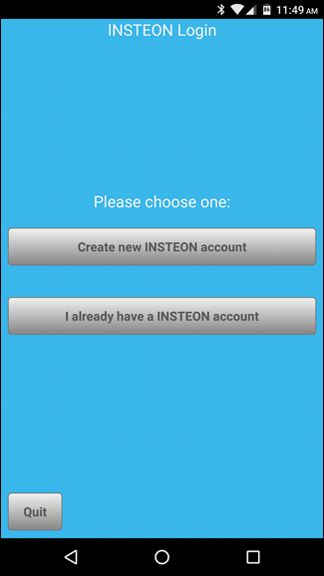
Download and install Insteon for Hub app, and . Choose “Create New Insteon Account” on the first page. Accept the license terms and create your account.
下载并安装和Insteon for Hub应用程序。 在首页上选择“创建新的Insteon帐户”。 接受许可条款并创建您的帐户。

Plug in your hub (if it isn’t already), and tap next in the app.
插入您的集线器(如果尚未插入),然后在应用程序中点击下一步。

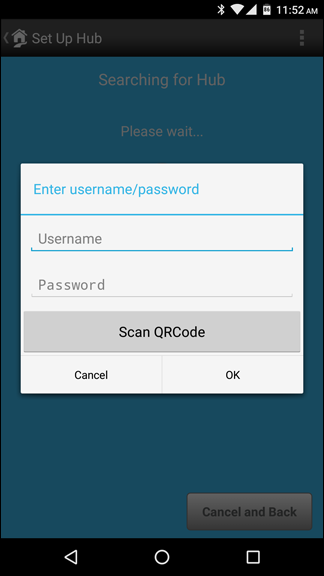
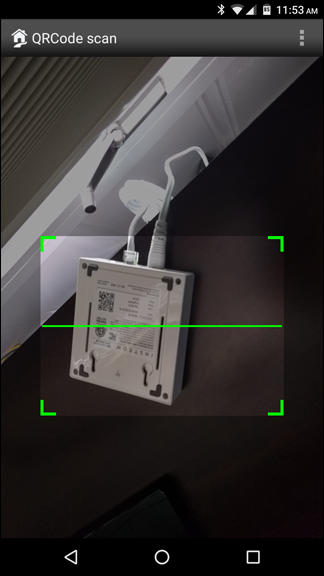
Next, you’ll be asked for a username and password. You’ll find this on a sticker on the bottom of your hub. Alternatively. you can tap the “Scan QR Code” button and scan the QR code on the bottom of your hub.
接下来,将要求您输入用户名和密码。 您会在集线器底部的标签上找到它。 或者。 您可以点击“扫描QR码”按钮,然后扫描集线器底部的QR码。
Once your hub is identified, Insteon will prompt you to start adding devices.
一旦识别出中心,Insteon就会提示您开始添加设备。
如何添加新设备 (How to Add a New Device)
Grab the device you want to add–we’ll be using an outdoor smart outlet for our example–and snap a picture of the QR code and device code on its sticker. This is especially handy if you’re putting it in a hard-to-reach place.
拿起要添加的设备(在本例中,我们将使用室外智能插座),并在其标签上拍下QR码和设备代码的图片。 如果您将其放在难以触及的地方,则特别方便。
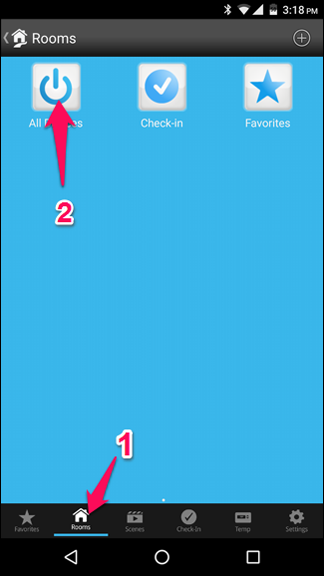
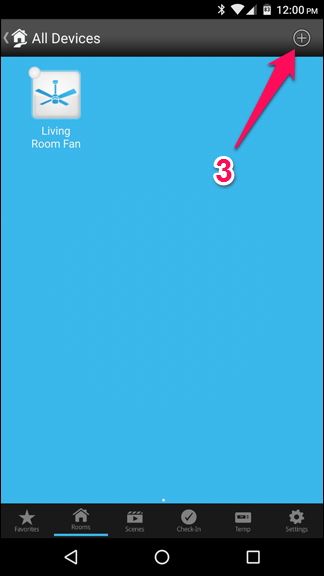
Then hook up the device and continue with the process. If this is your first device, Insteon will take you directly to the “Add Device” screen. If not, you’ll need to get there from the home screen of the app by going to Rooms > All Devices, then clicking the “+” sign in the upper right-hand corner.
然后连接设备并继续该过程。 如果这是您的第一台设备,Insteon会将您直接带到“添加设备”屏幕。 否则,您需要通过以下方法从应用程序的主屏幕到达该位置:转到“房间”>“所有设备”,然后单击右上角的“ +”号。
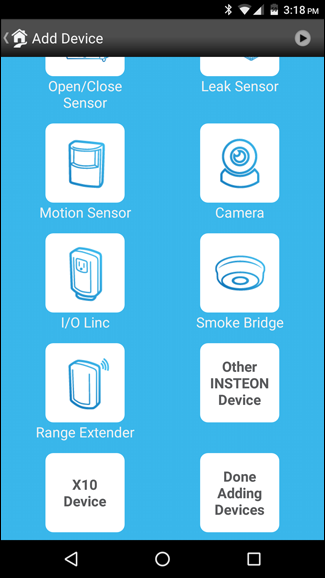
On the Add Device screen, Insteon will present you with a list of possible devices. Tap the one that matches the device you’re adding. In our case, we’re adding a plug-in module, so we’ll tap that.
在“添加设备”屏幕上,Insteon将为您显示可能的设备列表。 点击与您要添加的设备匹配的设备。 在我们的例子中,我们要添加一个插件模块,因此我们将其点击。
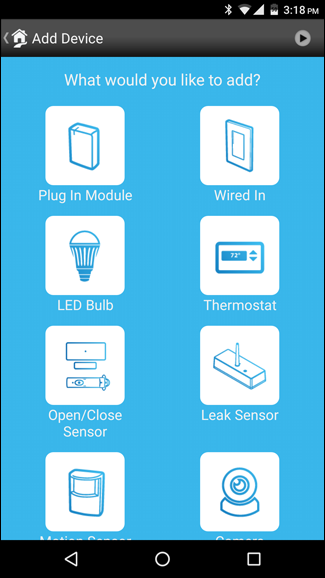
(If your device isn’t listed, scroll to the bottom and choose “Other INSTEON Device”).
(如果未列出您的设备,请滚动至底部,然后选择“其他INSTEON设备”)。
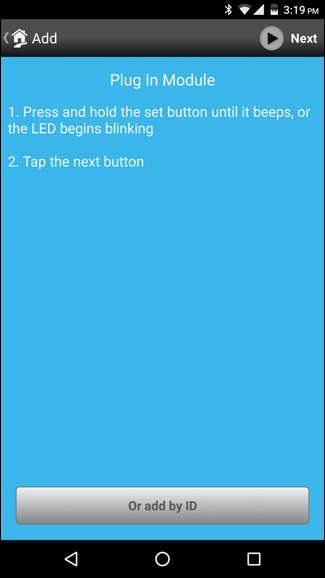
Next, press and hold the “Set” button on your device until it beeps or begins blinking, Alternatively, tap the “Add By ID” button at the bottom of your screen, and type in the device’s ID number. Insteon will search for and set up your device.
接下来,按住设备上的“设置”按钮,直到发出哔哔声或开始闪烁为止。或者,点击屏幕底部的“按ID添加”按钮,然后键入设备的ID号。 Insteon将搜索并设置您的设备。
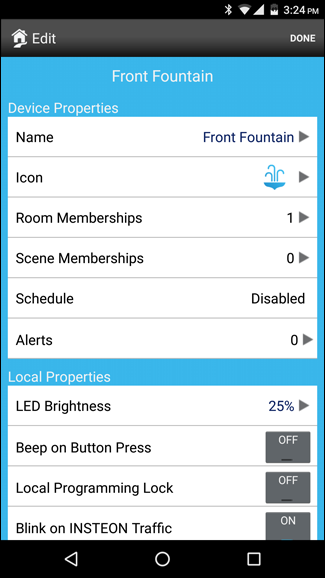
Once it finds your device, you can give it a name, choose an icon, assign it to a room, and customize a number of other settings.
找到设备后,您可以为其命名,选择一个图标,将其分配给房间并自定义许多其他设置。

When you’re finished, tap “Done”.
完成后,点击“完成”。
The device will show up on your main Insteon screen, and you can turn it on and off from there.
该设备将显示在Insteon主屏幕上,您可以从那里打开和关闭它。
also support the Amazon Echo, while others are more half-supported. But if you put those devices into scenes, you can control them with your voice that way. If you have an Echo, be sure to read for more info.
还支持Amazon Echo,而其他则得到了一半以上的支持。 但是,如果将这些设备放置在场景中,则可以通过声音来控制它们。 如果您有Echo,请务必阅读进行获取更多信息。
翻译自:
转载地址:http://haawd.baihongyu.com/